
When it comes to bookkeeping for rental property owners, entering rent received to an accounting software is one of the most fundamental works they do. This blog will show you 4 ways to enter rent in QuickBooks, and when to use which method.
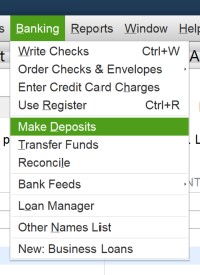
For many of the owners, simply using “Make Deposits” will be good enough. Just go to “Banking” at the top, and choose “Make Deposits.”
When the “Make Deposits” screen opens up, enter the following information.
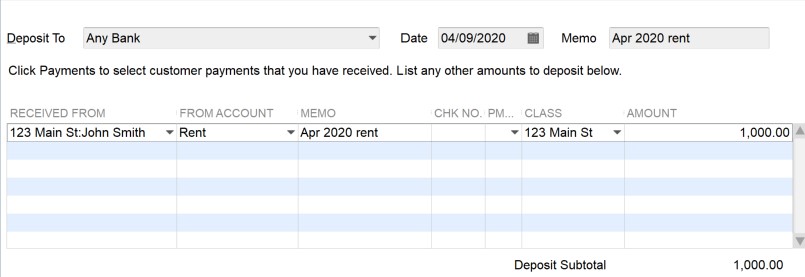
Deposit To - Name of the bank where the rent is deposited to.
Date - Date of the deposit.
Memo - General information about the rent. Putting the month of the rent will make it easier to see what months got paid.
Received From - Tenant's name.
From Account - Income account called “Rent.”
Memo - Same memo as the above will be fine.
Class - The property address.
Amount - The rent amount.
While the above method works for many of us, if you own a lot of unit, it’s nice to be able to see who paid and who still owes money for how much. In order to see it, you need to create an invoice. Go to “Customers” at the top, and click “Create Invoices.” You can also just click Ctrl+I.
When the “Create Invoices” screen opens up, enter the following information.
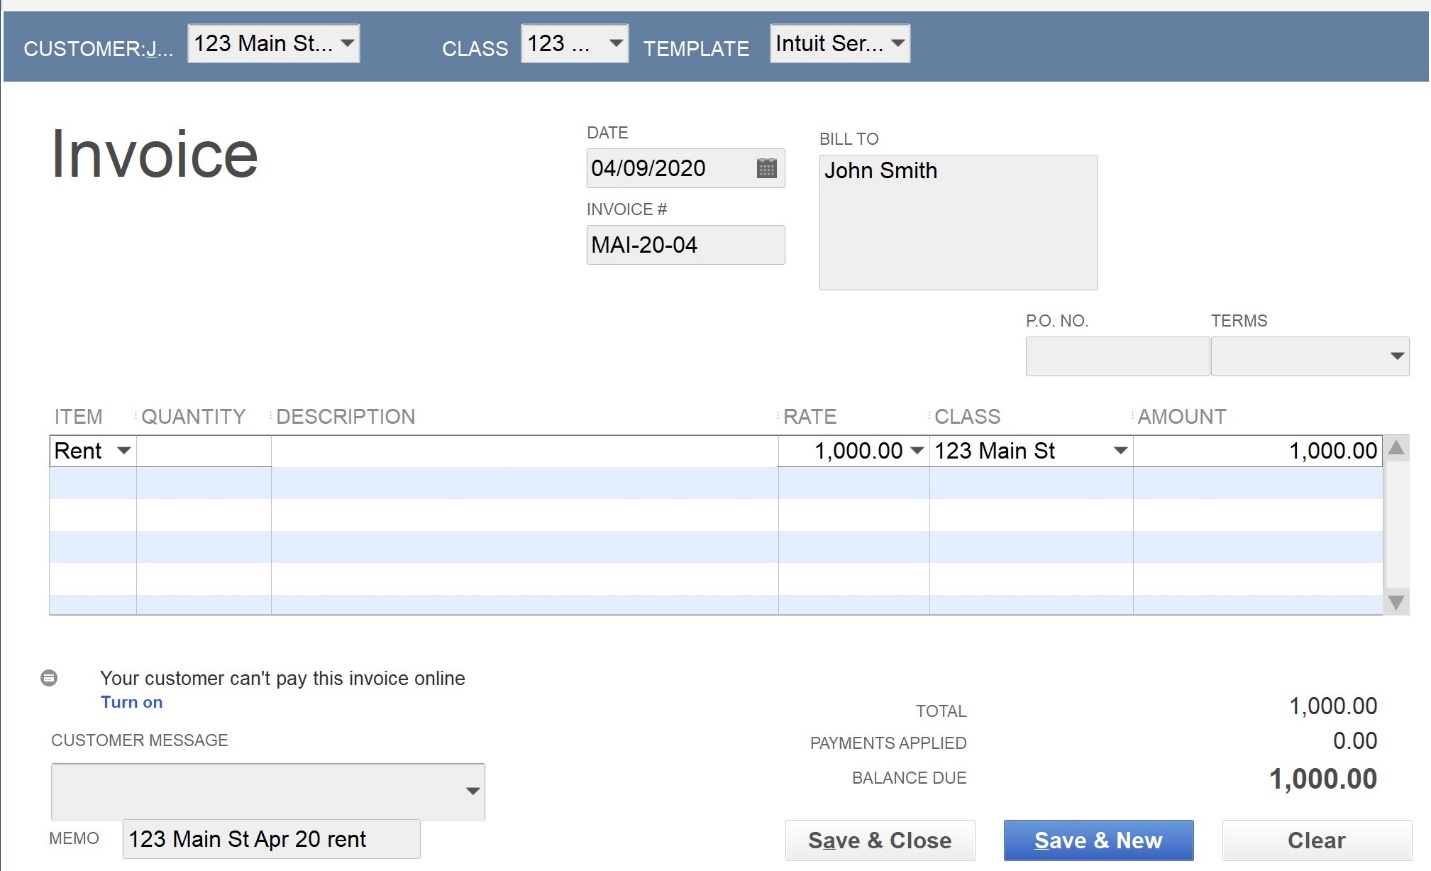
Customer:Job - The name of the tenant
Class - The property address
Template - Service invoice
Date - The rent due date
Invoice # - Make the last number the same number as the number of the month. If the invoice is for April, put 4 at the end, so that the next invoice number will be automatically 5. This works well if you collect rent every month.
Bill To - Automatically shows the name of the tenant.
Item - Rent.
Rate - The rent amount.
Class - The property address.
Memo - The property address, the month and the year of the rent. For example, you can put “123 Main St Apr 20 rent.”
Before you “Save & Close” the invoice, go to “Memorize” at the top. Enter the following information.
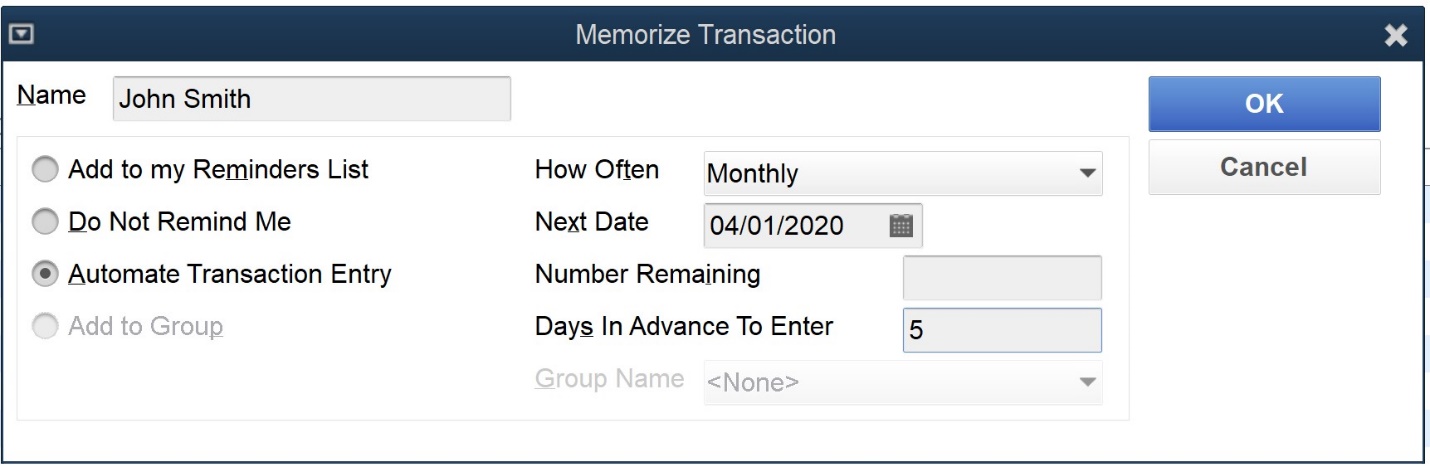
Name - Name of the tenant will be fine.
Click “Automate Transaction Entry.”
How Often - “Monthly”
Next Date - Date of the first invoice
Number Remaining - Leave it blank.
Days in Advance To Enter - 5.
This way, the invoice will be created automatically every month, and you don’t have to manually create it.
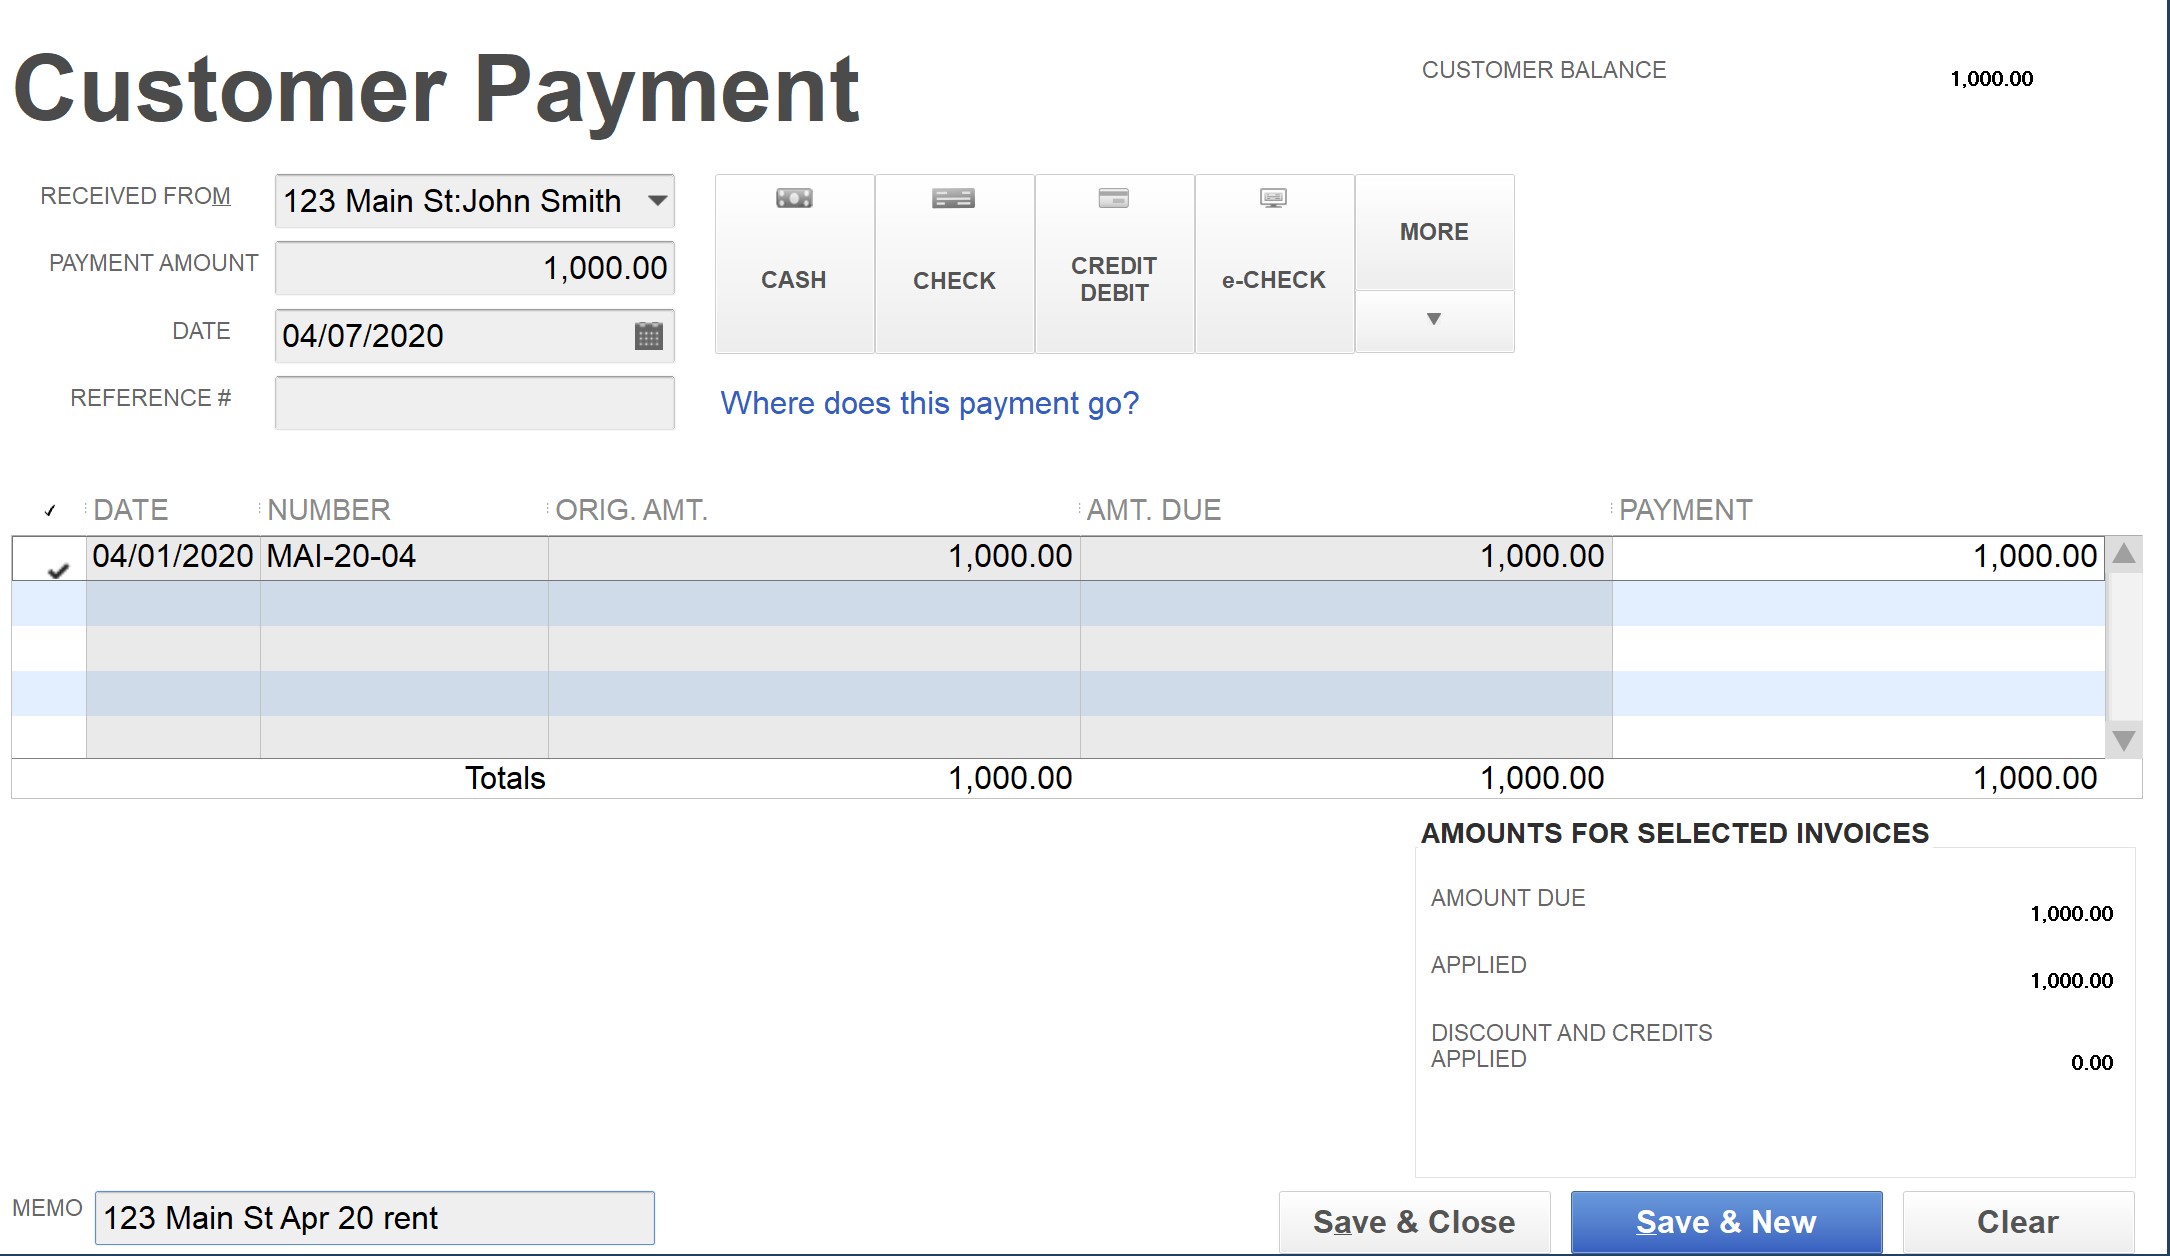
When you actually receive the rent, go to "Customers," then "Receive Payments." Pick the right tenant from the "Received From" drop down menu. Unless you received the rent prior to the invoice date, you should see the invoice. Just enter the amount you received at where it says "Payment Amount." Click next to the date, and you will see a check mark. At the bottom left, enter "123 Main St Apr 20 rent" in the memo field. Finally, just "Save & Close." You just received the rent.
The third way of receiving rent is by using sales receipts. If you are using a property management company, the entry to QuickBooks will be a bit complicated. You want to record all the transactions happening within the property management company to QuickBooks. For example, if you use “Best PM” to manage your property, Best PM will receive the rent on behalf of you. Then, it’ll take the management fee from the rent, and send you the balance to you, which is called "owner draw." The amount may look like below.
04/01/2020 : +$1,000 – Rent
04/10/2020: -$100 – Management fee
04/15/2020: -$900 – Owner draw
04/15/2020: $0 - Balance
You want to see the above transactions within QuickBooks, so that you can easily reconcile the property management company’s transactions and the transactions within QuickBooks. If you just enter “+$900” to QuickBooks, how do you know if that’s the right amount? By mirroring the property management company’s transactions in QuickBooks, including the actual date, you will able to see exactly what you are receiving, and what you are paying. You can simply go to the report called, “Transaction Detail by Account.” However, one problem the report has is class will not be assigned to the transaction done by “Make Deposits” or invoices. This will make it useless if you have more than one property. To make the assigned class show up, you have to receive the rent payment by sales receipt.
Go to “Customers” and “Enter Sales Receipts.” The entries will be similar to how you enter the invoice.
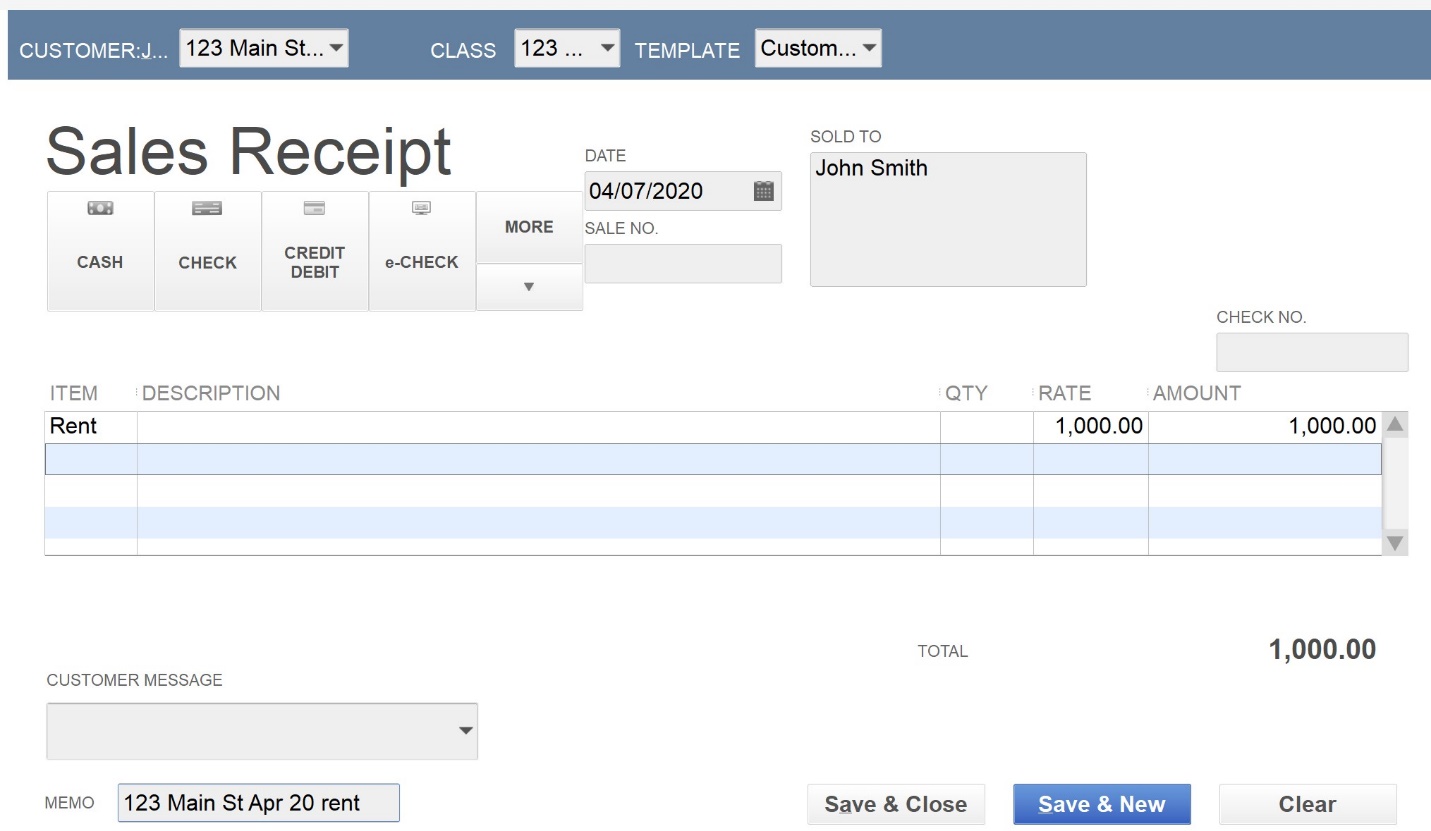
By using the sales receipt, the class will show up in the report, and you will be able to see all the transactions done within your property management company by property.
Finally, you can use the journal entries. The only time you may choose this option is if you start using QuickBooks in June for example, and you want to enter all the rent received prior to start using QuickBooks at once. This way, you don't have to enter multiple deposits, invoices or sales receipts.
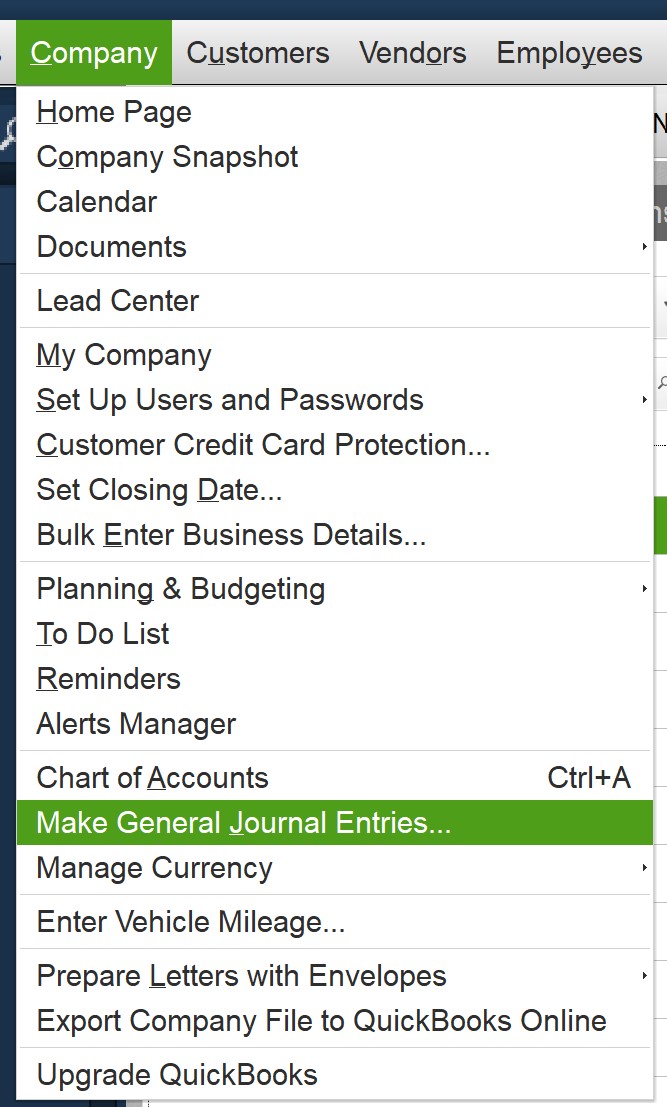
To enter the journal entry, just go to "Company" and then "Make General Journal Entries..."
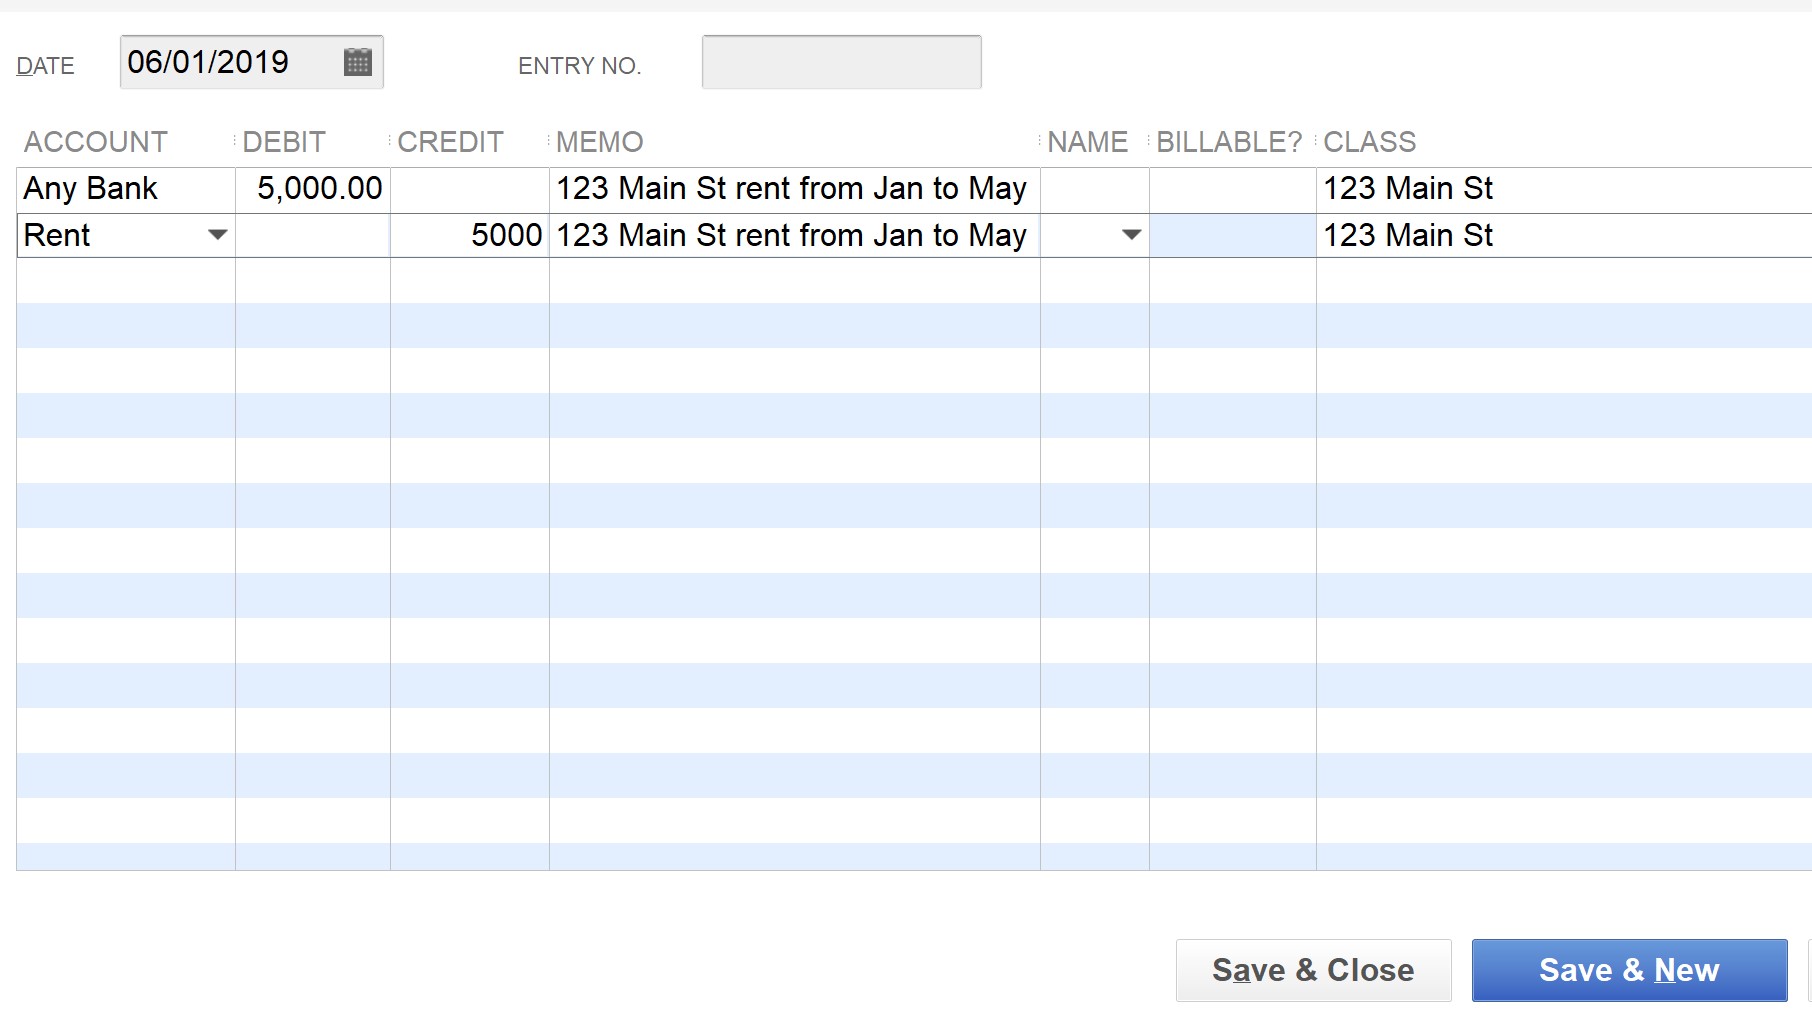
The entries will look like below. The most important thing to remember here is there is $5,000 DEBIT (even though the bank account goes up by $5,000) from "Any Bank," and $5,000 CREDIT for the rent. I won't go into detail why that is the case, but doing the opposite way (intuitive way for many people) will result in wrong entries.
In summary, you can use “Make Deposits” if you only have a few rental properties. If you want to keep track of the balance per unit, use the invoice to receive rents. If you use a property management company, use the sales receipt to receive rent. If you want to make one time entry of multiple transactions, use the journal entries.